Monday, December 29, 2014

Free 2015 Calendar Printable - By Lia Griffith

Just popping by to let all you lovely's know;
 
Lia Griffith (who by the way is fantastic with all her freebies) just posted a new 12 month calendar printable.
 
Find it below!
 

http://liagriffith.com/printable-2015-calendar/?utm_source=LiaGriffith.com&utm_campaign=f6177f2232-Handcraft_Your_Life_10_9_2014&utm_medium=email&utm_term=0_e8d7ffacc0-f6177f2232-196498057
Lia Griffith Calendar Printable

 
So awesome!

Dressing my Christmas Table 2014

I hope all of you lovely's enjoyed your holidays (or are still on them)

My husband and I hosted Christmas day dinner for 11 people, which at first seemed like a daunting task with our apartment being more on the smaller side. Also, the kitchen is a tight galley style space that becomes a weird contemporary like dance as one contorts and bends to maneuver from oven to sink.

But we did it! The dinner turned out fantastic (minus the one major hiccup of our turkey not fitting in the oven....)

But never fear, my favorite MIL came to the rescue and cooked the turkey for us at her place. Ha-ha you liked that right? My favorite? Tee-hee.

All said and done everyone was stuffed with goodies and it was a very memorable evening!

As soon as we decided we were hosting dinner it was like my inner Martha turned on and the entire month of December was spent thinking, searching and designing the perfect table. It was all I could think about - I had an "Ah HA" moment when I realized I could reuse some wedding items like gold chargers, ivory napkins and glasses. I did however get a tad disgruntled when I realized the napkins I thought I had were not linen but an odd Satin (so we made due with red paper ones)

I spent awhile thinking about place cards and I was on Pinterest a lot! It is super addictive and I find myself on Pinterest for almost an hour sometimes every night before bed. Eventually though with time running out and the night drawing near I decided to create Salt Dough Ornament type place cards.

I found these awesome ornaments and thought wow I can make that! Maybe?


Courtesy of Google

Salt Dough Recipe

1 Cup Flour (I used All-Purpose)
1/2 Cup Salt
1/2 Cup Water

Once rolled out and cut into shapes. Place on baking sheet in oven at 200 for 2 hours. Voila!

I found that the dough would try to shrink up/dry out quickly so I added some water to it every so often as needed. Another thing I found with my stamps, I wasn't sure how to get rid of the edges (maybe next time I will use different stamps). Overall I liked the end result once painted.


Not bad for my first time? Below is my table setting that we ended up with! I did forgot to add string to my ornaments.... Duh. But hey I don't think anyone really noticed.


Thanks for stopping by!!!

P.S

As the new year approaches I've been giving some thought to some positive changes, to begin with I bought; "The Happiness Project" By Gretchen Rubin. So far its been very inspirational and I think I will be starting my own type of happiness project for 2015. Which oh my gosh... is in 3 days!

Ta ta for now!

Tuesday, December 16, 2014

Fa la la la la la la la la!

It's getting closer to SAAAANTA! (picture Will Farrell screaming from the movie Elf) LOL.

I visited Indigo today and they have the cutest accessories for this holiday season. I'm really drawn to the natural wooden cheese boards and platters they have this year and very tempted to buy some. Yes some. One can never have enough cheese platters? Or candle platform settings, or to use in a cool dinner table setting right?

Or what about a monogrammed cheese board, with matching monogrammed knife?

Chapters - Indigo


Even better most items are on sale right now! Just thought I'd let you know!!
 
Tis the season lovelys!


Monday, December 15, 2014

What's Up Doc?

Hello Lovelys,

Yes I have been a terrible blogger as I realized that its been ALMOST a month since my last post.

A lot is happening in the "Sarah-sphere" with Christmas right around the corner, literally next week, and we are hosting dinner (which I am totally excited for, yet nervous with our teeny tiny kitchen) also I might add were off to a poor start as my MIL pointed out that the turkey we were so proud to have purchased ahead of the game ISNT a cook from frozen. *Le Sigh. Ok so rambling done.

I am channeling my inner Martha with this Christmas dinner though and have already created these adorable place settings (which I can't show you yet) and I have all of this excess wedding décor from my wedding that hey, why not put it to use again! Plus there will be this adorable centrepiece (DIY-ing of course) and much more! WHEW.

With it being just over a month since we moved, I'm finding we are still unpacking. Well ok, I am still unpacking all of my craft/supplies/office as it was a storage container disaster up until last week. Its still chugging along and hopefully with my staycation beginning this Friday I will be able to make the final dent in the organization!! (Or there could be a lot of Pyjamas/Tea/Christmas Movies but hey I'm being optimistic lol)

I will leave you guys with an adorable pic of my little boy Dilbert. (Spoiler alert - this could be the theme for my xmas cards this year)


Merry Christmas & a Very Happy Holidays!!!

Wednesday, November 19, 2014

Unpacking as far as the eye can see...

We have moved officially!

Ok... we moved really officially on Nov. 1st. and yes, I guess that has been 19 days of fresh apartment and 19 days of hypothetical unpacking.

Between cleaning, hanging, our cousin Mike so graciously dealing with many fix it, nail it, hang it and install it, working and some life hiccups.... THERE ARE STILL SO MANY BOXES!

Whew. Sorry for that. Had to be done. Its kind of like screaming off into cyber space.

The point of all this rambling is just to touch base (I have not forgotten you) my office how ever is a pile of boxes from wall to wall that I hopefully can begin to tackle this weekend.

On the bright side of things, I can re-theme and re-decorate my office space and choose a whole new design! Yay!

As for my DIY projects, I did redo some chairs however my DIY/spray painting is on hold due to the amounts of snow falling and freezing weather.

Toodles noodles

Tuesday, October 28, 2014

Weekend DIY Part 2

Happy Tuesday lovelys!

So as I'm sure many of you thought well hey that list of DIY projects to do in one weekend was pretty large.... well you were definitely right!

I think it was very over zealous of me to think that I could refinish four chairs, a dresser, three tables and a backsplash in two days, while moving boxes and packing, super crazy I know! But ones got to think big? Maybe?

Anyways, here is the progress update on my project list and to start off its pretty!

Our kitchen at the new place is on the tiny side, but perfect for us and our furry family! I got on the idea of backsplashes and had dreams of subway tiles and grout. Ok. Maybe not the dreaming part but I love subway tiles, stone and detailed mosaic tiles. Since we are in a rental property we are limited to what we can do and also what is worth spending the money on for a rented space. Seeing as we are most likely going to be here for a few years spending just under 90$ to visually make a massive change was well worth it.

I read a lot online about contact paper options but for the life of me couldn't find ones I liked and didn't see many options available at stores. Total bummer! I am glad I didn't go with the contact paper I found because it would not have worked. See below.


I found this roll at Canadian Tire in their 3M Wall Décor section. I was not really feeling the other styles they had and this stainless steel option was the only cool/pretty one there. It also would have made the backsplash look extremely fake and in turn tacky in my opinion. So it was a NO-GO.

Fast forward to my trip to Home Depot where I found these Adhesive Tiles that are Peelable and (keyword here) REMOVABLE!!! Yay! It's a renters dream!

Of course choosing a style and colour were now going to occupy my mind for the night as I squinted, turned the pieces every which way and tried to visualize it in the space until my face turned blue!

My options: (sorry about the layout still trying to figure out inserting images in blogger)


So! I chose the black/white/steel square pattern, what I realized was you would need more pieces of the rectangular shaped tiles in order to piece together areas and go around outlets.
 
To place the tiles you just do a few simple steps, make sure the surface is clean and dry then off you go. Its as simple as peeling a sticker. There is some finessing involved with aligning and of course crooked walls but its manageable.
 
Took us about an hour and voila, new backsplash and new look!


I don't have the before picture but it was just a plain white wall. This easy backsplash completely changes the space and once all the appliances are out and in the space all of the stainless steel will tie into one another.
 
So, lots of info above right? What about those other projects? Well they are in my garage currently started but not yet finished. The goal is to get them done before we move this Saturday!
 
Toodles lovely's


Thursday, October 23, 2014

Weekend DIY Projects Part 1

My husband and I are moving and the official move date (Nov 1st) is less than 9 days away!

So this weekend we will need to summon super hero abilities and between packing/cleaning/bringing boxes over/unpacking; somewhere in there complete three re-finishing projects.
 

Our first project is easy; I have four previously DIY'd chairs that I will be giving a face lift with a glossy paint (I'm thinking either a high gloss grey or a robins egg blue) I figure a light sanding and away we spray paint. Done!

Next project is a bit more time consuming. My parents found this beautiful antique dresser on castors, it's currently in a "peeling paint" condition. So we will need to strip it, sand it and then re-stain this baby. Unless painting it would be better? There are so many blogs, forums, posts etc about ways to paint and refinish furniture and its enough to make your head spin... so we will see what route will be taken.

Finally (and I think this will be the tricky project) we currently have a set of old tables, one coffee and two side. They were my husband's grandmothers and we absolutely not only love the sentiment behind them but the sturdy craftsmanship that seems to come with older furniture. 

Currently they are what I call that 1970's orange-ish with a coat of the polyurethane. The question is how do we refinish these pieces without spending hours sanding and staining while keeping the beautiful insets and wood grain designs.

I may have found a product that will work which is a two in one poly and stain. The product says that your only need a "light sanding only" between coats. Easy peasy right?

My step dad would probably cringe at this suggestion, as he is in the old chemical and hard-core sanding way of thought for refinishing furniture; but hey I want to save time and try a new product!

This post is very text heavy and I will be uploading pictures as we go this weekend as we attempt to hopefully refinish all three projects!

Wish us luck lovelys!

P.S. As we are in chaos move mode and blog/site posts being sparse and in between, don't worry! My office will be up and running in no time and posts/items/ideas will be flying off the screen at you! (Ok not really but you know what I mean)

Tuesday, October 21, 2014

Logo Alert!

My new logo has finally been created! I am quite excited to put this baby to good use!
 
This will serve as the image for Lovely Blossoms Studio from here on out:


Life is sweet!! Kaytee's awesome DIY Sweets Table

This weekend I had the pleasure of celebrating the engagement of my lovely friend's Kaytee and Matt who are getting married in 2015.

It was a fantastic evening filled with great people, good pranks (Matt) and an adorable sweets table with Décor created by the bride to be Kaytee.

Below is the overall look. Including a pinwheel backdrop!


Very nice use of tissue paper flowers and printables incorporated into this table-scape! Then in the centre of the table a tree with pictures and more tissue paper flowers which added a neat twist and height to the table. Awesome job Kaytee on not only a beautiful décor job but for the great party!

Friday, October 3, 2014

TGIF!!

I LOVE Friday's!

But I guess who doesn't? Even though work doesn't stop just cause its the weekend but it does feel like a big relief Aha moment !

I am very excited to have gotten my hands on a Kanzashi Flower Template (Michaels) even though they only had the small versions. When I visit the states next weekend I am making a pit stop at Hobby Lobby and Joann's Crafts (HUGE selection of items by the way). Although Michaels is great here in Canada I still feel like we lack a lot in selection.

I have step by step photos that need to be edited but this is what the packaging looks like for the flower I made last night. (I had to try it out even though I was exhausted)

Kanzashi Template
Why or how had I not seen these before ???? I am definitely not a sewing type person, more so I cannot sew other then hemming.

BUT this amazing little plastic piece is like a sew by numbers! You follow the numbers and connect the dots and voila! You create individual petals that are sewn perfectly and neat. I am still fiddling around with the middle and how to sew it together but for now my first attempt looks pretty good! I have to thank my co-worker for letting me in on this flower making process cause it is super cool.


Another FANTASTIC piece of news, well more so for me anyways, but I was down 5lbs as of Sunday that just passed! And I am hoping that it has gone down more since then!!

I have my first weigh in on Monday and I hope that I will stay on track this weekend even with a big wedding tomorrow; all that delicious food! I will keep you posted. I do have to say though that low carb, no sugar, salt & fat.... Has been a challenging adjustment!

Don't forget to check back this weekend for more updates/posts!

Later Lovelys xx

Friday, September 26, 2014

New business cards are here!!

Lovely's and Gentlemen, my new business cards have arrived!

They are too cute! Since I am so excited about them I just had to show everyone.


Cute right?

And yes, I used Vistaprint. They have been very good with their deals and turnaround times. I would definitely recommend using them.

Later Lovelys

Thursday, September 25, 2014

Hello Fall, Hello New Boutonnieres

Lovelys!

My bad for being away for so long! I've started a new restricted low-carb diet plan and as some of you may know the first couple days/weeks are the toughest! On a side note I am surprised there are not more blogs or recipes out there online for the person like me who needs to get creative with low carb cooking. With that being said I've attempted to focus the brain power I do have on my 9-5er. But never fear I'm up in full force again!


With Fall officially here this means colours, feeling, temperatures and themes are a changing!!! So of course I have to keep up with the latest and coolest wedding trends for Fall and Winter.

Although I am a huge fan of the off whites and creams, burlaps and rough fabrics, twines and twigs; shopping recently for new trending materials has been so much fun. I am very excited to incorporate these new babies into the collection! Shades of mauve are so hot right now. Royal blues and that off beige gray are fantastic and lets not forget the browns with gold hints and sparkles! You will definitely be seeing these creations coming up in the blog and if I can find my own minions (despicable me) maybe I can get the website up within this month? But that is wishful thinking and well unfortunately minions are animations :( LoL.

If you are still hanging on to those visions in ivory/creams and pale pinks then these guys are perfect for you! But hey, on yet another side note, when it comes to your wedding accessories it all comes down to what you want regardless of the season!!!


Tuesday, September 16, 2014

Hello Lovelys!

Toronto had amazing weather today! A little on the chilly side but can't complain about the blue skies! I wish I had spent a little more time outside than in front of a computer screen but cest la vie!

Just popped by to say:


Worked on a couple more boutonnieres last night, they are so much fun to create! Although I need to step out of the white and neutrals for a bit. Will go a lil more fall-ey and winter-ey. Yes I made up my own terms.


Cute right? Love the vintage keys, I don't know why but they are so adorable. I always picture having this massive drawer filled with intricate keys that unlock some random door somewhere... but hey this isn't la-la land, would be awesome though. Maybe I can start a collection of just random keys and put them in a drawer? Ha - all this desk action (or lack there of) is making me crazy!

Talk to you later lovelys ;)

Friday, September 12, 2014

Coming up... Fall/Winter 2014 & 2015 Spring/Summer - Bouquets & Boutonnieres

Things are very busy in the studio crafting up a storm and creating one of a kind bouquets and boutonnieres for the fall/winter season and even start of spring/summer 2015!!

I will have pictures/process up soon!!

In the meantime here is a look at the Pantone colours of fall 2014 and Spring 2015.


Ta-ta for now lovelys!

Get Creative - Die-Cut Machine & Boutonnieres

After creating flowers from fabric using various other methods I was trying to think of a new way to "cut out" a petal form without having to use scissors. With much research I came across a few methods and machines that can do this.

First off was a specific machine just for fabric from Accucut. These are heavy duty machines and for this application I felt it was more appropriate for a quilter. Also they are fairly expensive and begin roughly around $500.00

Other options included brands like Cricut, Silhouette, Sizzix and a few no names. From electronically operated to your more hands on (hand-cranked) machines I finally came across the "Big Kick" by Sizzix.

I read multiple reviews that said this machine was great as a multi-use tool and could use other product's die-cut templates which was cool. To use the BigKick you sandwich your template and medium (paper, fabric, cardstock) between two pieces of cutting matt and hand crank it through the machine. Then voila your shapes are cut out perfectly from the medium of choice. Key word here is "medium of choice" as I found with other machines they only cut one type (paper only) which would not work for me.

I had some fun playing around and cutting out shapes in fabric last night.


I ended up creating these cool pieces done in linen/chiffon (seen below). I also have been recycling and up-cycling older clothing items into cute pieces and may have figured out the next move for some fall/winter themed bouquets and boutonnieres!  In the mean time take a look below!


Have a great weekend lovelys!

Wednesday, September 10, 2014

Petal Series Part One: Types of Chairs

I thought it would be interesting and a bit of an FYI to post a few blog entries on the parts and pieces that go into creating/setting the overall look and feel of your wedding day. You may be thinking, what is this chick talking about?

Well, for instance did you know all the types of linens, runners, ruffles and place setting types there are? Or how many different chair types and sizes or styles you can rent? What about tables? We've got rectangular, round, sweetheart sized and then we can get into space arrangement? How many people to you sit at a 72" round table versus a 8' rectangular?

Now do I have your brains clinking?

First up lets get into the type/style of chairs that you use to create the overall theme for your big day!

Chiavari Chairs:

These beauts come in various colours as seen below and also are currently the big trend happening in a lot of weddings right now. I personally used the white metal chiavari chairs at my outdoor wedding and they went perfectly with the space and décor. At this time I know you can rent these chairs in both wood and metal. Depends on rental location as to what colours and materials they rent out so check ahead if you know what you want. These chairs rent out anywhere from $8-$10 dollars a chair and are worth the price.

Ghost Chair:

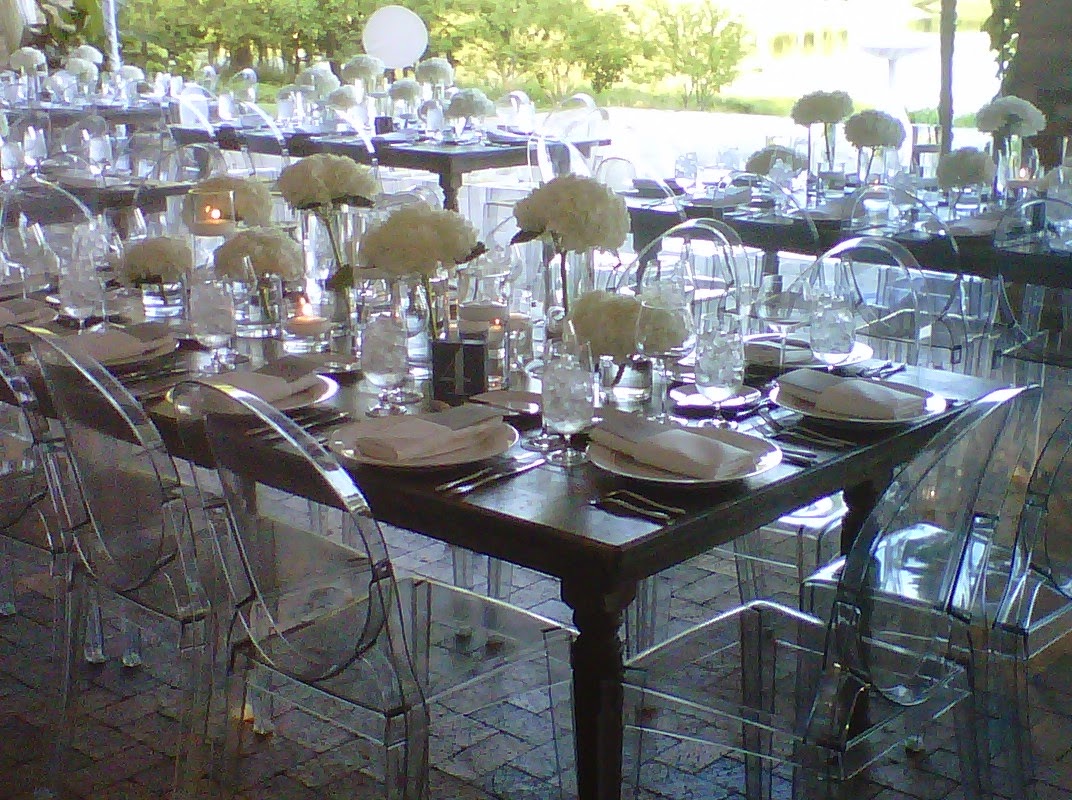
These chairs are made out of acrylic and are slightly stronger than your typical plastic lawn chair. Many applications are done in the clear chair which can create a lighter visual effect but with a luxurious feel. The Ghost chair looks fantastic in garden and outdoor weddings as everything can be seen through the acrylic aiding the overall vision. These chairs also look fab in more modern applications such as banquet halls. To make a bigger statement and if you have a monstrous space choose the solid white or black (this then defeats the purpose of the "ghost" chair) but does create one heck of a presence.


French Slotted Chair:

Perfect for a garden or barn venue these chairs are great for space saving and easily moved from ceremony to the reception if needed. They can come in various materials; the natural wood being a very rustic application; perfect for the garden wedding.

Bistro or Bentwood Chairs:

Bentwood/Bistro chairs sound exactly like they look. Round backs created out of bent wood or in the new age metal or resin. These types of chairs can be used in all types of venues and depending on colour or material give you a variety of applications to choose from. It can work for a quaint garden party or a formal banquet reception. Either/or these are fantastic chairs to utilize at your event.

Café Vienna Chairs:

These chairs are what I would call a done up version of the plastic lawn chair; don't get me wrong they are very quaint and perfect for an outdoor event. They create the illusion that they are small which makes it seem like you have more space. These chairs I would specifically use for a garden event, vintage barn or again outdoor location. One thing you have to take into consideration with these chairs is the weight limit. Regardless of the chair you should always double check just to be on the safe side.

French Round Back Chairs:

This type of chair is beautiful for a more formal dining experience when use in the upholstered version. The second grouping shown below is a neat twist by having the back open/acrylic. You get the formality of the French Round while playing on the modern by having that negative space. These chairs give the illusion of more space by having the open hole. I would place these chairs in a banquet hall or in a grand hall as they are very heavy and large, making a big impact. Of course with these luxurious types of chairs they are definitely more suitable for a formal and traditional reception, unless you go for the more whimsical open backs which then the possibilities can be endless.


Versailles Chair:

This chair design is very similar to the Chiavari Chairs. If you inspect it further you can see the rounded chair back and smooth finish on all parts. Whereas the Chiavari looks almost like bamboo or wooden in texture. I believe this chair also comes in various finishes and colours to suit the colours of your event. The Versailles chair is suitable for any type of event and a very versatile piece to match any décor theme.


There are so many decorative chairs and more specific styles that you can rent, but of course they come with a price tag. Obviously these types of chairs shown above are the more popular and mainstream options that most rental supply companies will have readily available.

Hope that helped!!! Thanks lovelys